
Veracrypt is an opensource free tool that creates an encrypted container (Think password-protected folder) where we can save all personal files which we don’t want others unauthorized access to.
Veracrypt is based on Truecrypt (Old open source Encryption Container software) encrypts file realtime that means once all you need to move files to that container it will encrypt files.
It can also be used to encrypt USB Drives or windows system drives.
As an Open source tool, the Encrypted USB or Containers can be easily moved on different Operating systems Eg. Mac or Linux.
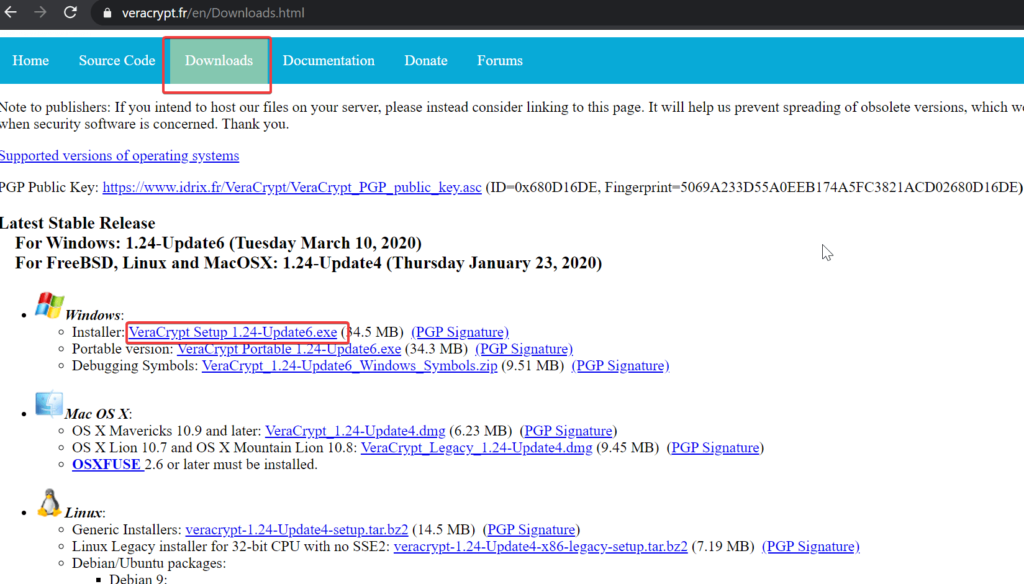
Download VeraCrypt
The download is simple, just visit the following site and download the VeraCrypt installer.
For this demo, I’m using Windows OS so I am downloading EXE File.
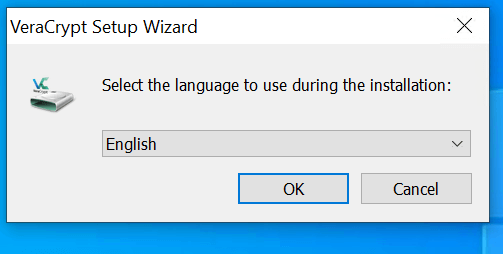
Installation of VeraCrypt
Installation is the same as installing another Application on a system. After download click on EXE file Select Language Click OK.
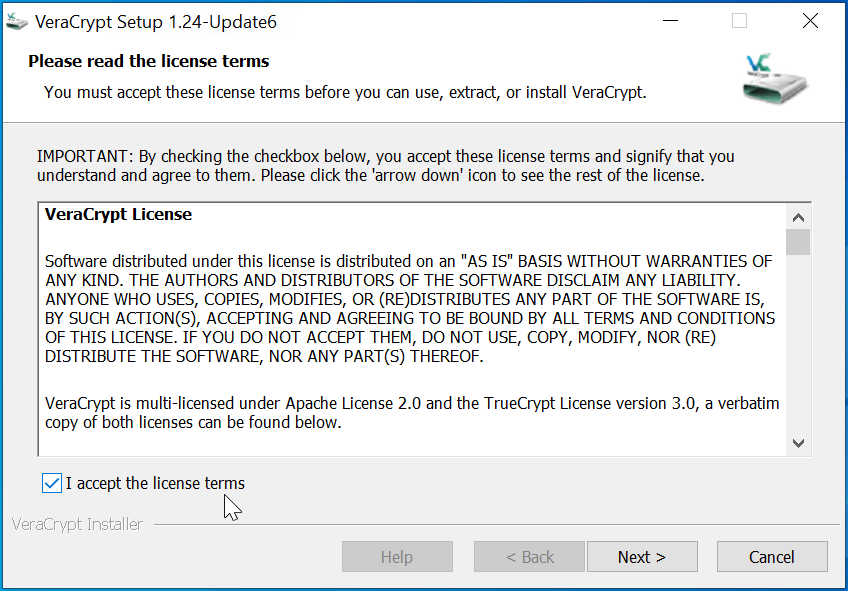
Accept Terms Click Next.
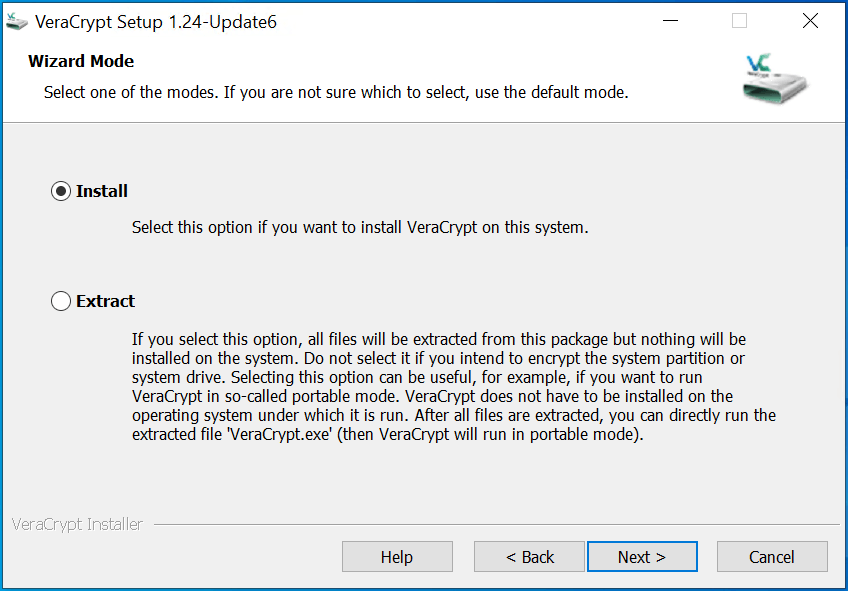
Select Install Click Next.
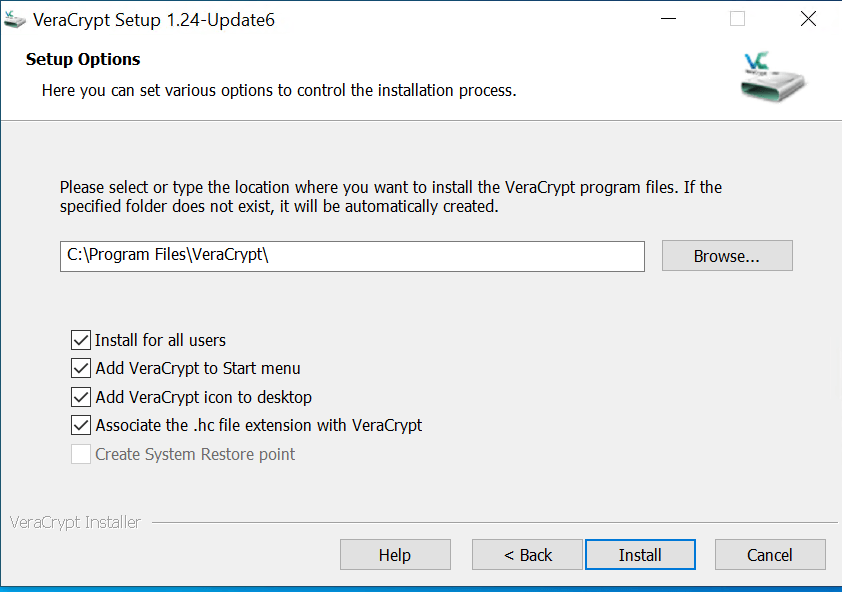
Now Prompt will show Installation location and Shortcut Creation Option Just Click Install.
Installation will Start


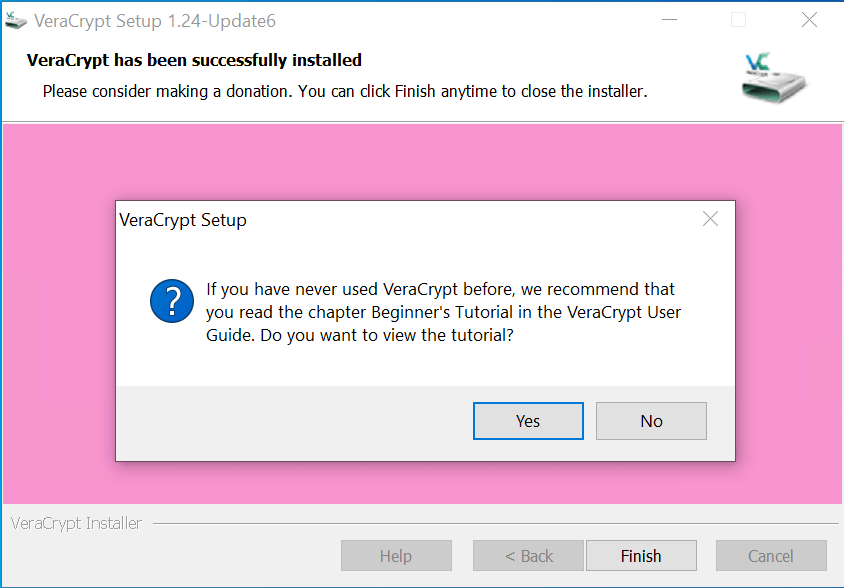
Click on Finish

VeraCrypt comes with a Guide That Helps to know how to use this application, for this Tutorial just click No.
Creating the First Container
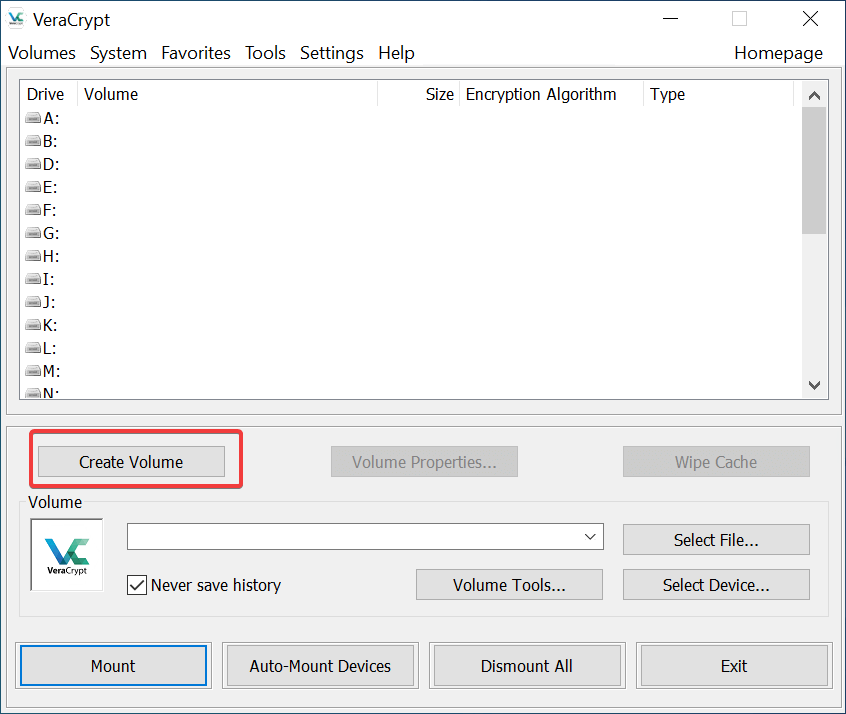
Open Veracrypt and Click on Create Volume.
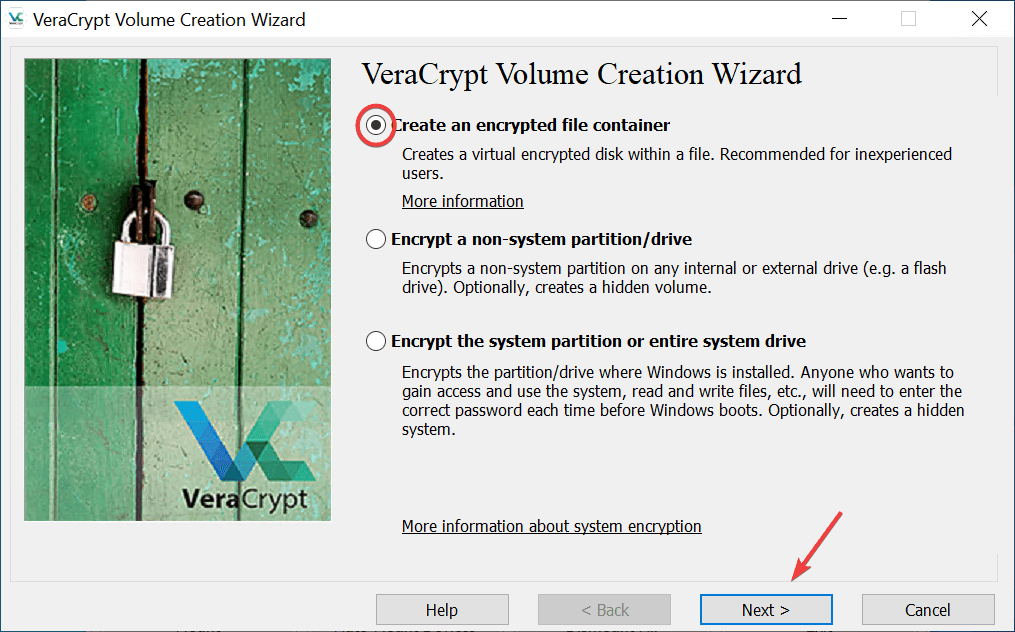
The Wizard will Start There are 3 options
- Create an Encrypted File Container (In This Post We are Going to perform)
- Simple word Create An Folder with Password Protected and Encrypted Data.
- Encrypt a Non-System Partition/Drive
- Little bit advance but it can help to encrypt D or E Drive Directly (As Starting Point Avoid This without any Backup of Data)
- Encrypt the system partition or entire system drive.
- This option on windows will encrypt the system so whenever the system starts it will ask password before starting windows (As Starting Point Avoid This without any Backup of Data)
Select Option and Click Next
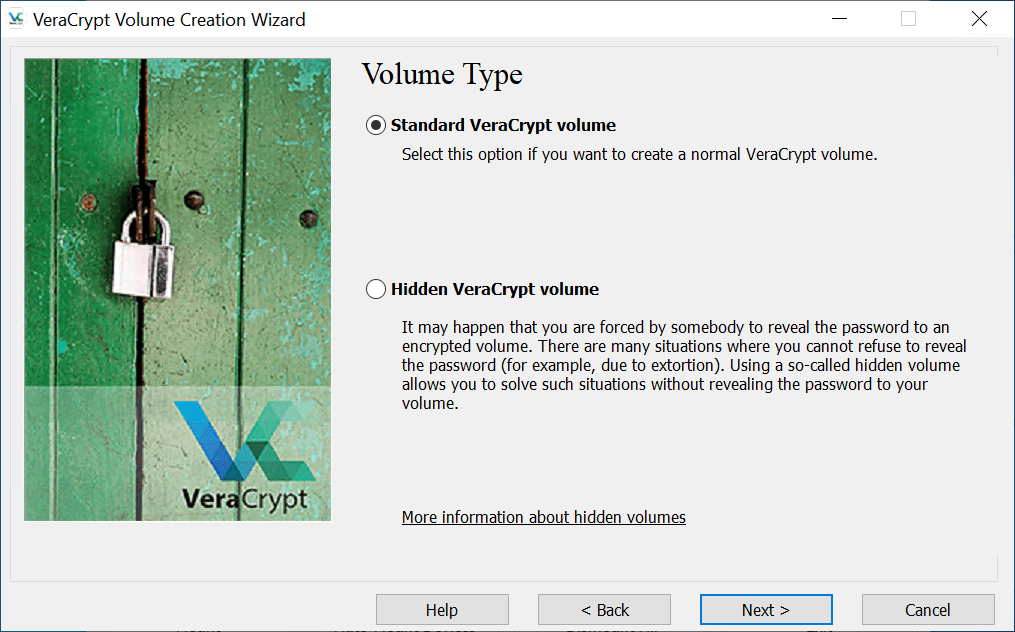
Next Option will ask to Create Standard Volume or Hidden Volume Select Standard and Click next.
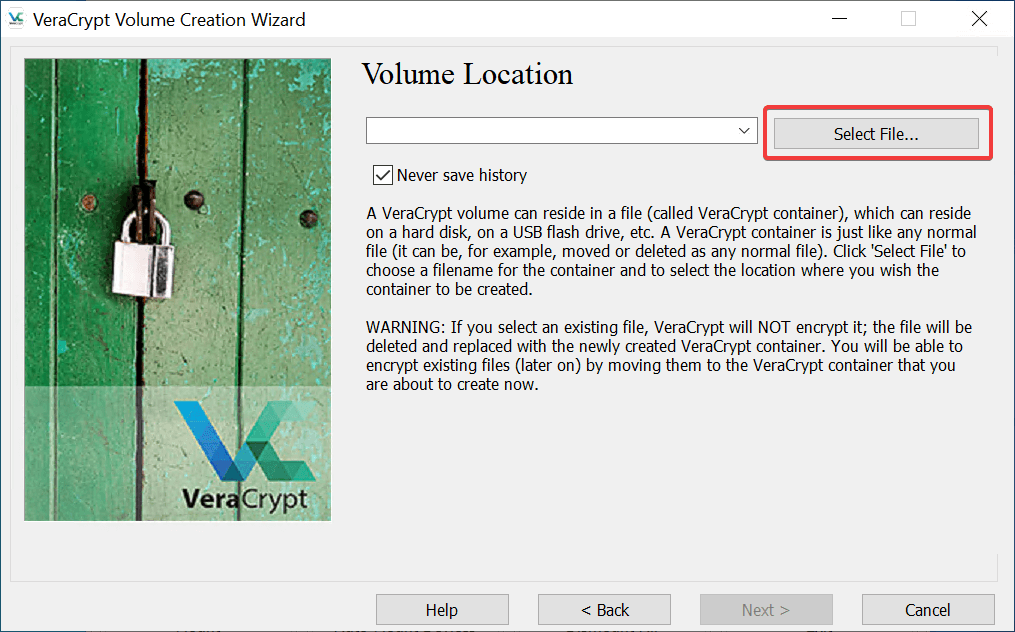
Now the option will ask to select a file just click on select File Option.
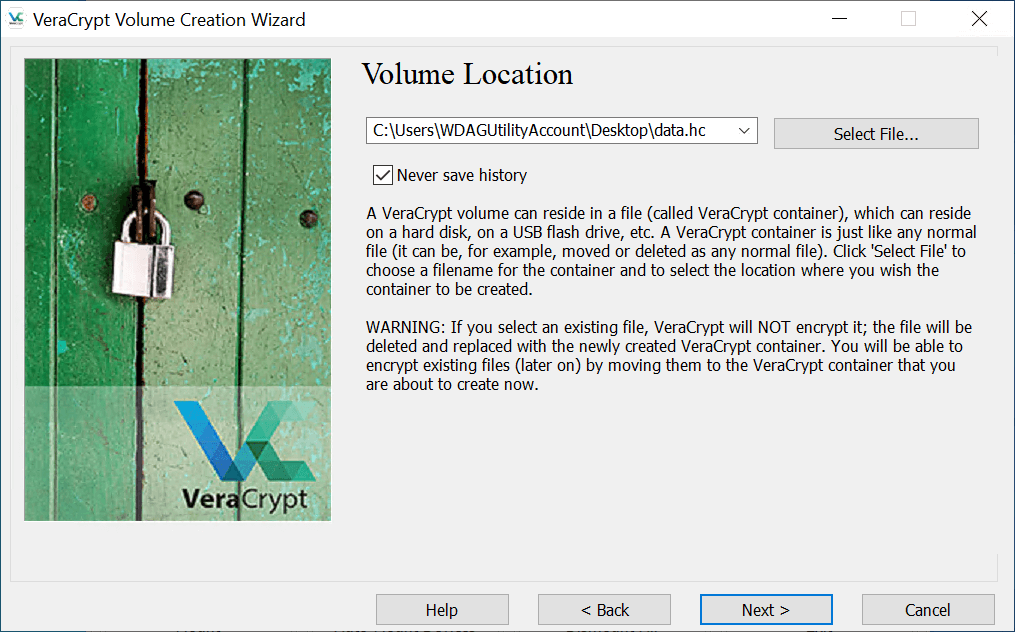
Select Location where you want to save file For this example I am selecting Desktop and Saving File as data.hc (You can name the file whatever you like) the extension .hc is Important as Veracrypt container extension name use .hc and click on Save

Now click Next.
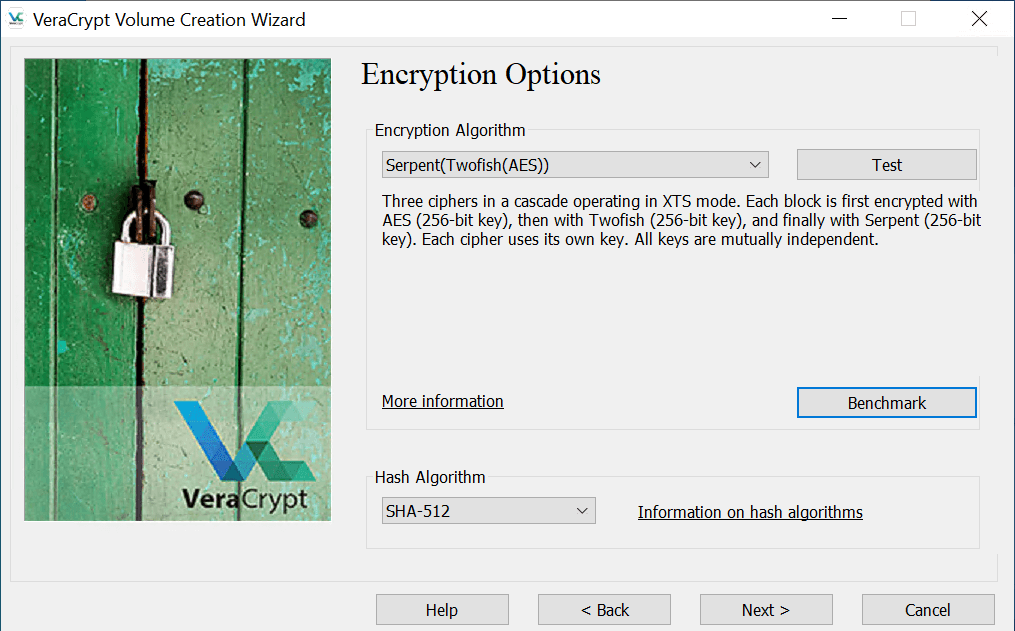
This Part we can select Encryption Type There are multiple encryption standards available for data encryption you can select any encryption type (Remember More encryption Type More Data Security but also More Performance is required from System) Select any encryption type.
For this post, I am selecting “Serpent(Twofish(AES))” which means first data will be encrypted using AES 256 bit than again that encrypted data will Again encrypt using Twofish 256bit and Finally Twofish encrypted data will again encrypt Serpent 256bit encryption.
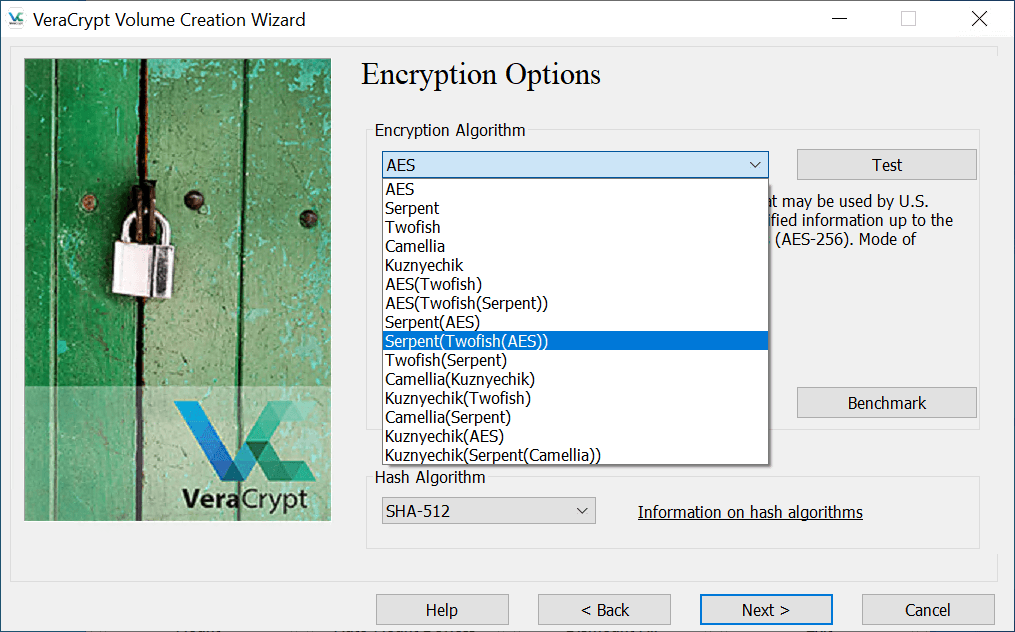
Hash Algorithm leaves SHA-512 Click next.
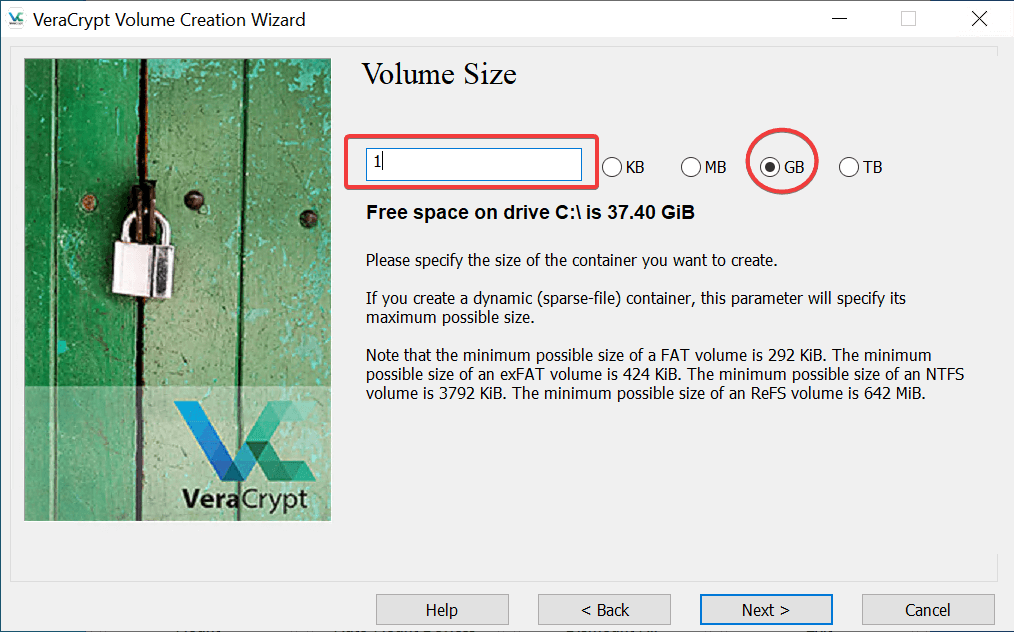
Now we need to select Size of The container (Remember the bigger size of the container will take that much of time to create) for this post I’m going to select 1 GB enough to copy on my NextCloud Sync folder and USB also save my all personal documents.
Click Next
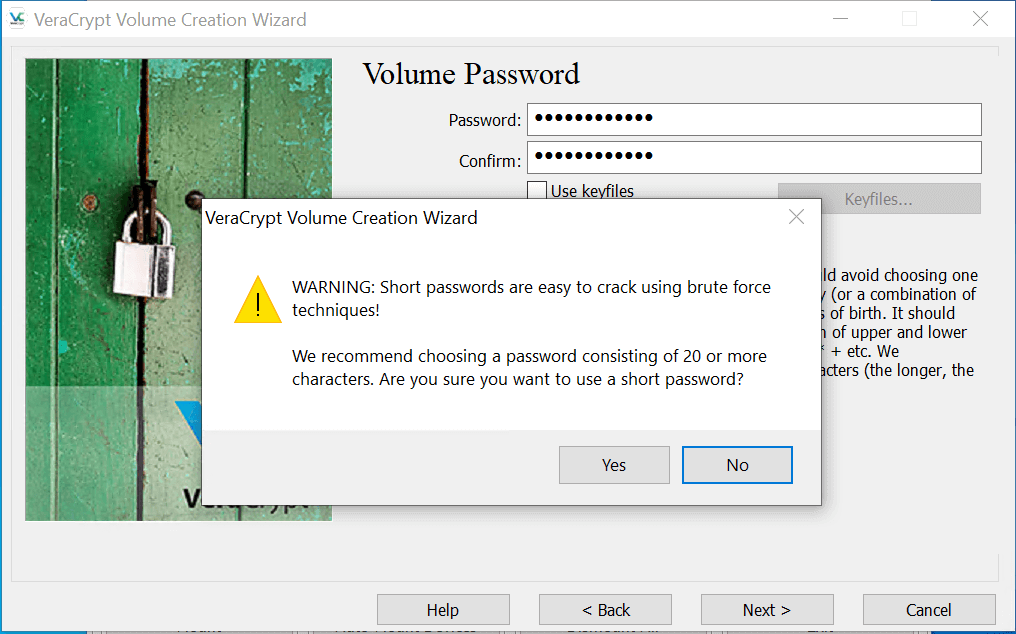
Need to set a password, Password can be 128 Characters Long using Special symbols. type any secure password and click next. (Remember The Password if you forgot the password its almost near to impossible to get back data you stored in Encrypted Volume or its better to note down the password)

The Popup will show a warning if the password is less than 20 characters Just Click on YES to proceed.
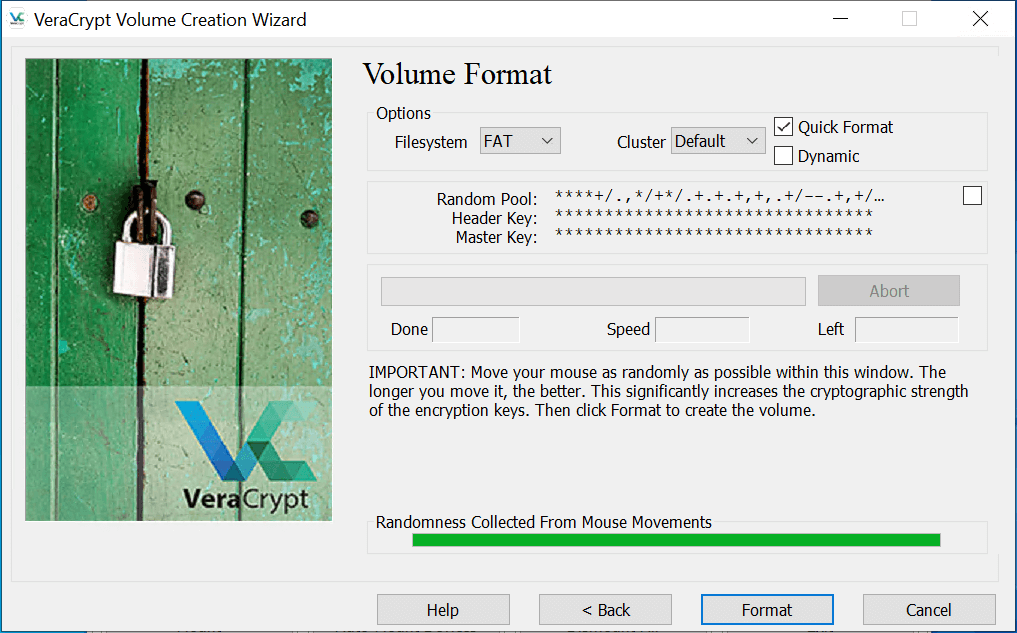
This is a fun part: you need to move the mouse random order in the window till the bar is full or green to add Cryptographic strength.
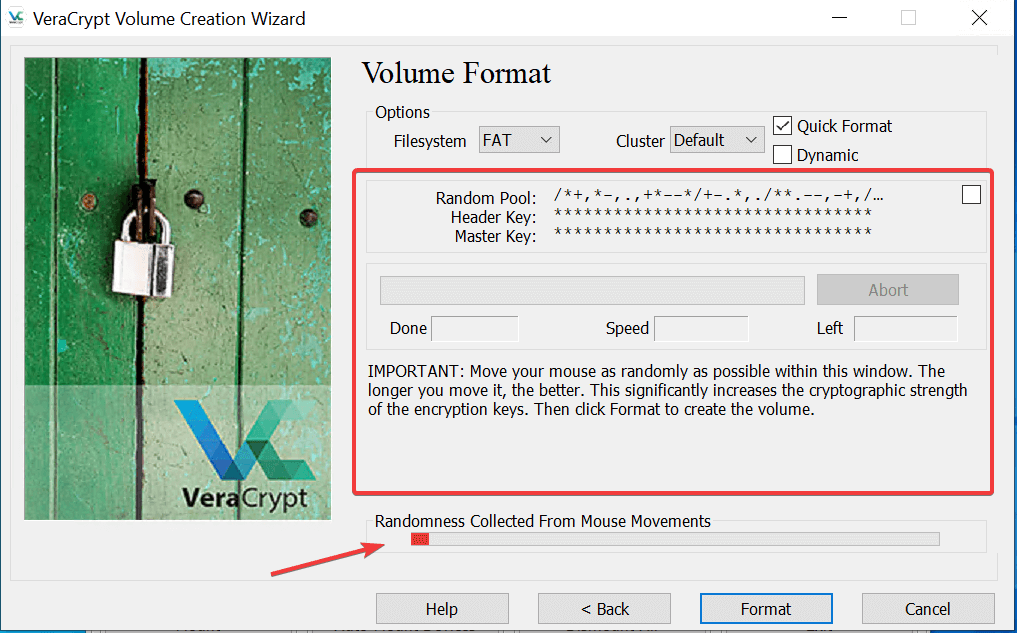
Now Click on Format.
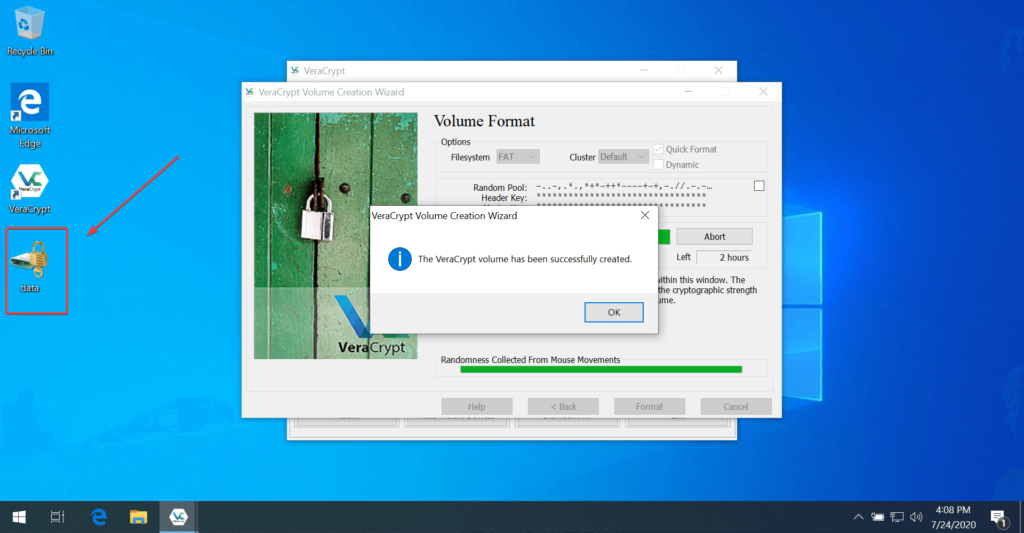
Once the format is completed you can see the file data is created on my desktop.
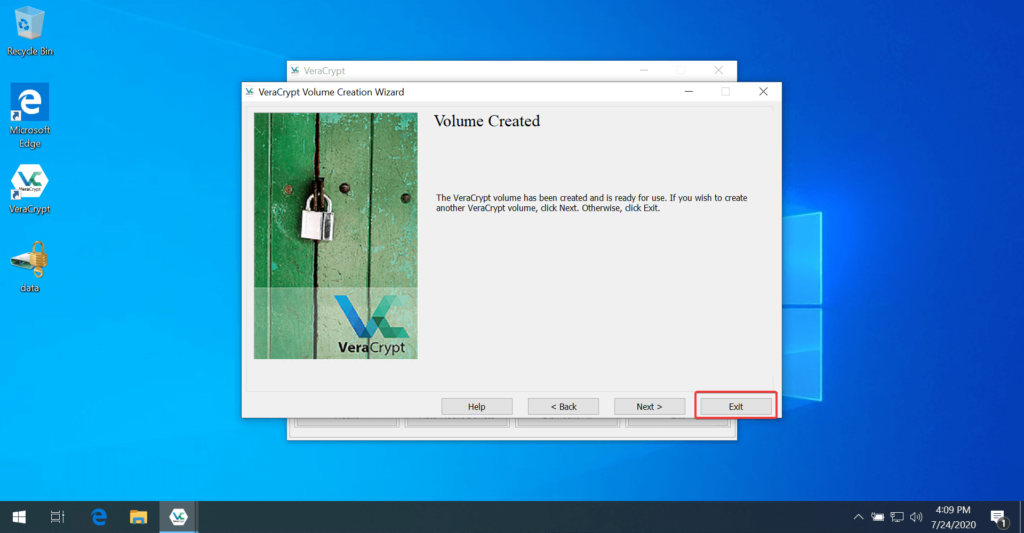
Click OK on Popup and exit the wizard and Program.
Mounting VeraCrypt Volume
Mounting files can be done in two ways.
Just Click on that Volume you created vera crypt window will open or Open VeraCrypt and Click on Select File Manually.
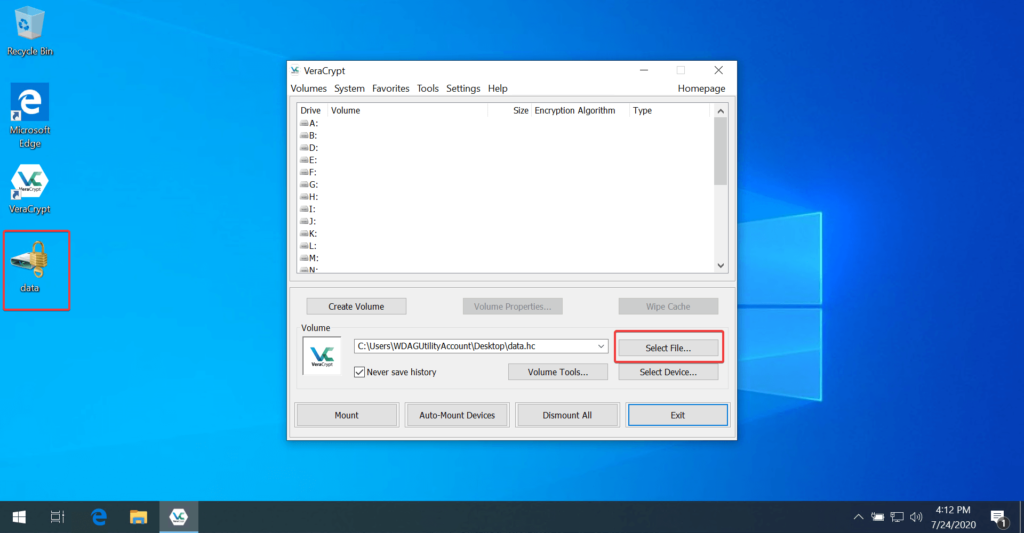
The Container is mounted as Drive so needs to select the drive letter where the encrypted volume needs to be mounted for this Post. I am selecting P as you can see this is no P Drive in my System and Click on Mount.

The Prompt will ask password Just enter the password and click OK.
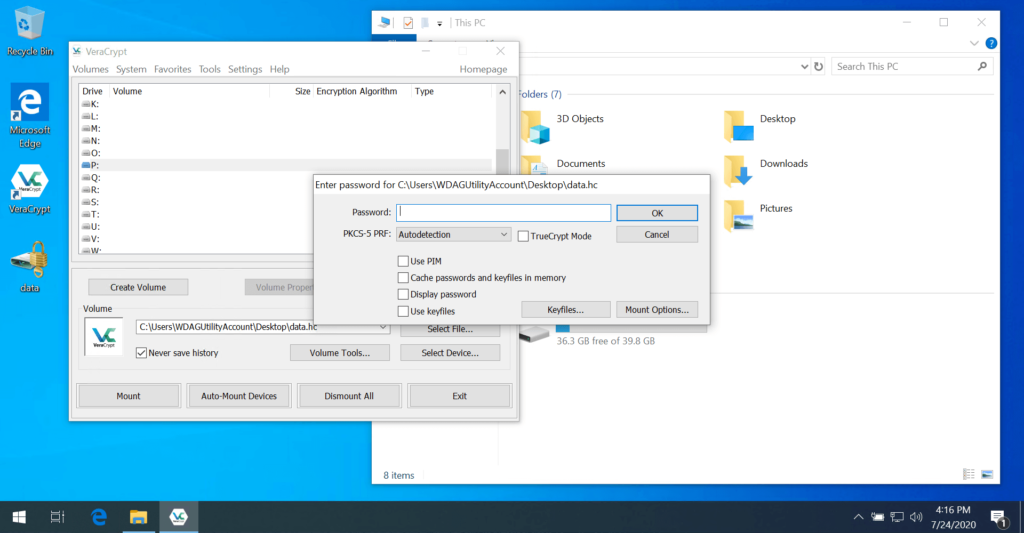
The Process will start and Mount the Container.


The Data Copy is Simple just move the files in that mounted drive in this care in P Drive.
Once you’re done click on Dismount and exit VeraCrypt.

Whenever required to access the encrypted folder Follow Mounting VeraCrypt Volume Instruction again.
You may also like Encrypted Note Taking Application Post.
Note: Some Countries Data Encryption is Not Legal so please know your rights before following this Post.