
This tutorial is a part of an series where first we need to understand how to install web-server XAMPP or WAMP in windows | LAMP in Linux and Installation of Net Beans IDE with Java Web EE for Web.
Prerequisite for this tut.
- Net Beans IDE better download bundled setup which include all and you should familiar with Net Beans.
- MYSQL server installer or its better to use portable MYSQL which comes in XAMMP bundle, I prefer XAMPP, you should have basic knowledge about MYSQL servers table creation and query commands and for portability XAMMP is better for Windows Environment.
After installation XAMPP all you need to find MySQL mysqladmin.exe and mysqld.exe which can be found in C drive “C:xamppmysqlbin” folder.
So Let Start…..
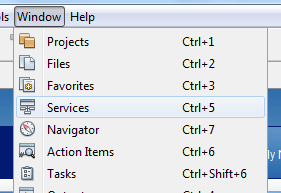
Fire Net Beans select Services tab from Windows menu (Ctrl+5)
Right Click on database select register MySQL Server

In MySQL Server Properties Basic Properties tab can be customize as per requirement.

Server Host Name: “localhost” (it will be different IP if MySQL server is hosted on different system)
Server Port Number: “3306” (its Default port number of MySQL but it can change in my.ini file in same bin folder)
Administrator User Name: “root” (default admin of MySQL better to connect as root for full access of system)
Administrator Password: (Leave IT Blank) (in XAMPP MySQL default installation password is blank but it can be change or leave it blank)
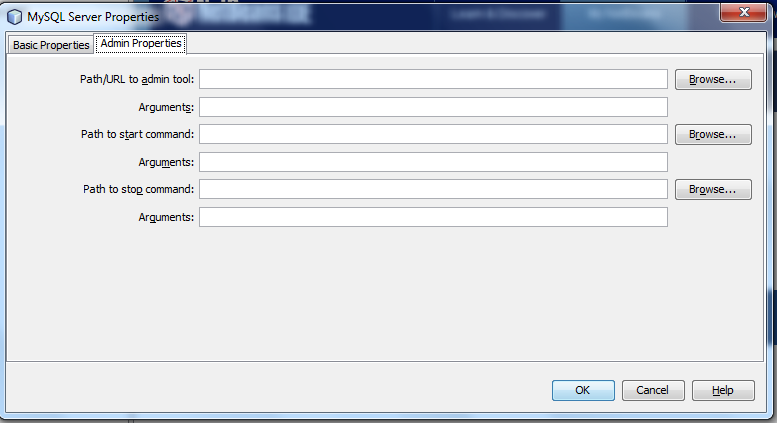
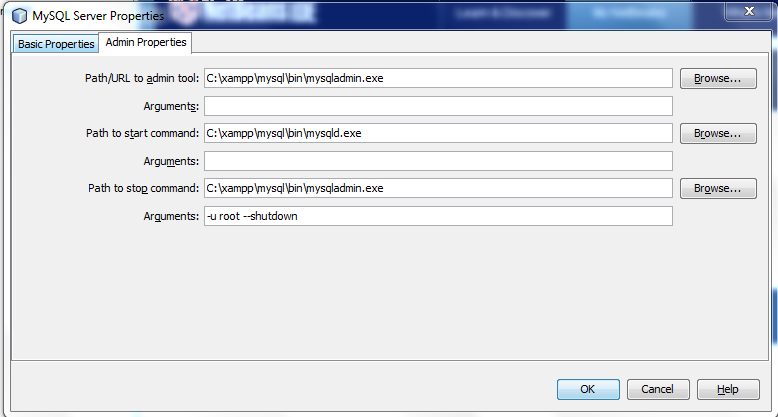
Now Go to Admin Properties tab where we require to add following.
Path/URL to admin tool: “C:xamppmysqlbinmysqladmin.exe” (The Absolute path of mysqladmin.exe if using XAMPP)
Arguments: (Leave IT Blank)
Path to Start command: “C:xamppmysqlbinmysqld.exe” (The Absolute path of mysqld.exe if using XAMPP)
Arguments: (Leave IT Blank)
Path to stop command: “C:xamppmysqlbinmysqladmin.exe” (The Absolute path of mysqladmin.exe if using XAMPP)
Arguments: “-u root –shutdown” (user is root blank password and command for shutdown)
Almost the difficult part is done now all we need to verify that our MYSQL databes is connecting and we are able to query the SQL tables via NetBeans .
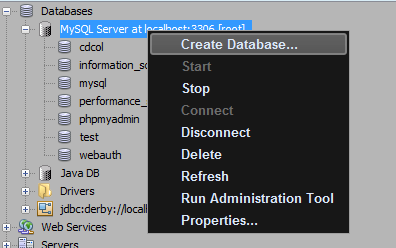
Now in Services tab Expand database
Right Click on MySQL Server at localhost:3306 [root]
in case if the server is on different system the localhost will replaced by IP address.
Click on Start

Let’s create and sample database and see all is working properly.
Right Click on MySQL Server at localhost:3306 [root]
Select in Create database for this demo i use name = SQLTest & grant full access.

Click OK

Now Expand the MySQL Server at localhost:3306 [root]
Right click on SQLTest that we have created

Select Connect.
The connection will be created as following path
jdbc:mysql://localhost:3306/sqltest*
Expand the database connection & your database
Right click on Tables
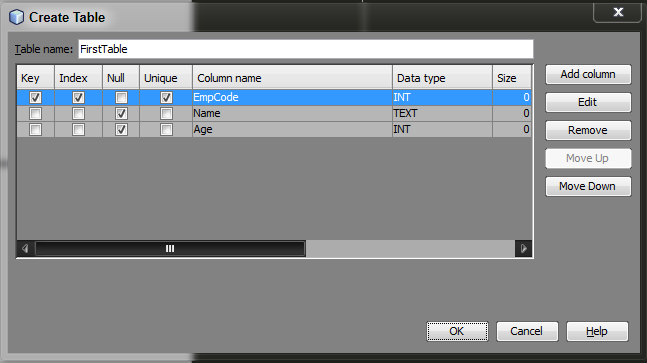
Select Create new Table

Add some columns in table
Execute Query if the table is created than.
Done now we have configured MySQL with NetBeans.